Advanced Sessions (Legacy)
CREATING THE LOBBY/SESSION
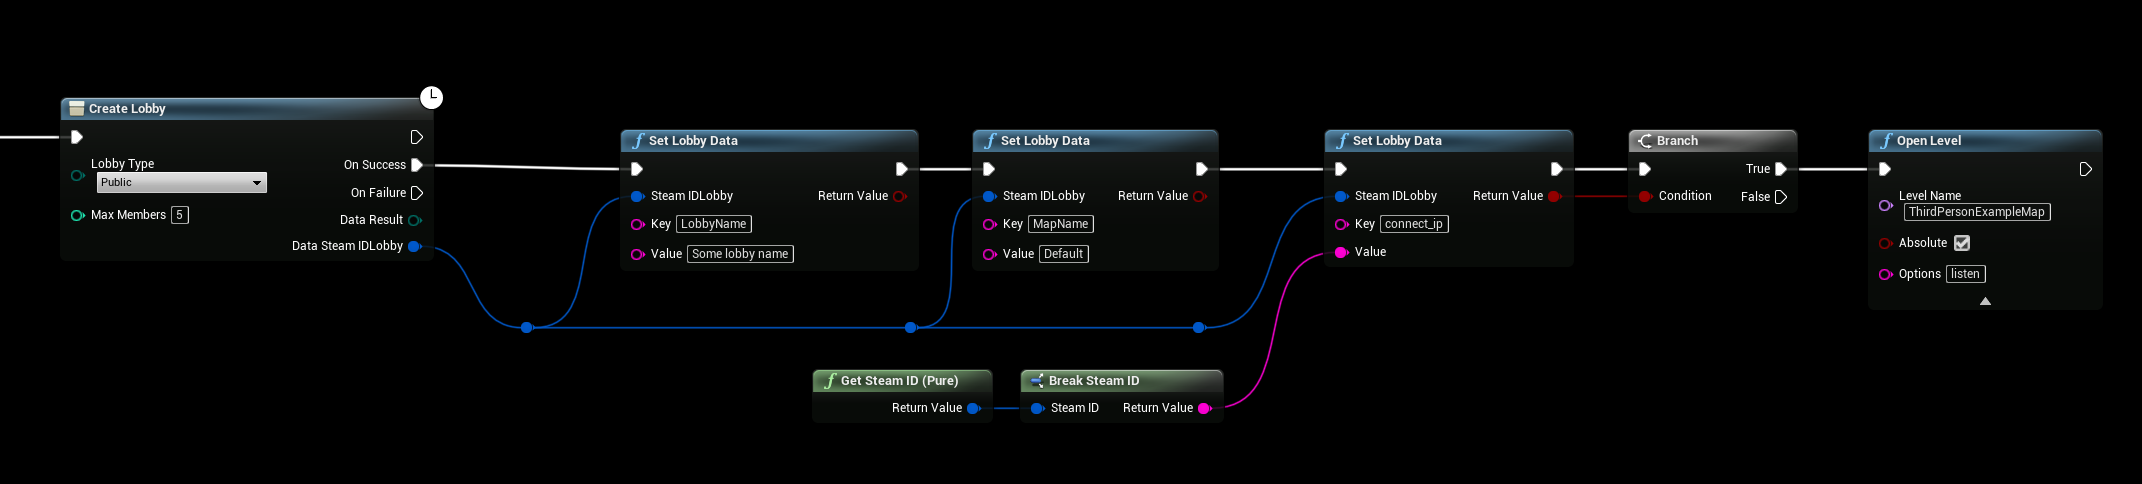 The CreateSession node used in Unreal Engine essentially creates a Lobby and then starts a game session, the lobby is used to store session data so we can find the game session using lobbies.
Here we begin by creating a lobby and updating the lobby data with our settings, you can set Any data here that you want, in this example we set “LobbyName” and “MapName“, but this can be anything you want.
We must also store our SteamID in the lobby settings so that the players know how to connect to us.
FINDING THE LOBBY/SESSION
 As previously mentioned we use Lobbies to store our session data in so to find sessions we must search for Lobbies.
Here we’ll find all lobbies available, we get the LobbyName, MapName and the MemberLimit as an example. You can store this data and set it in a WIDGET (UMG), but for simplicity sake we’ll skip this step in this tutorial.
JOINING THE LOBBY/SESSION
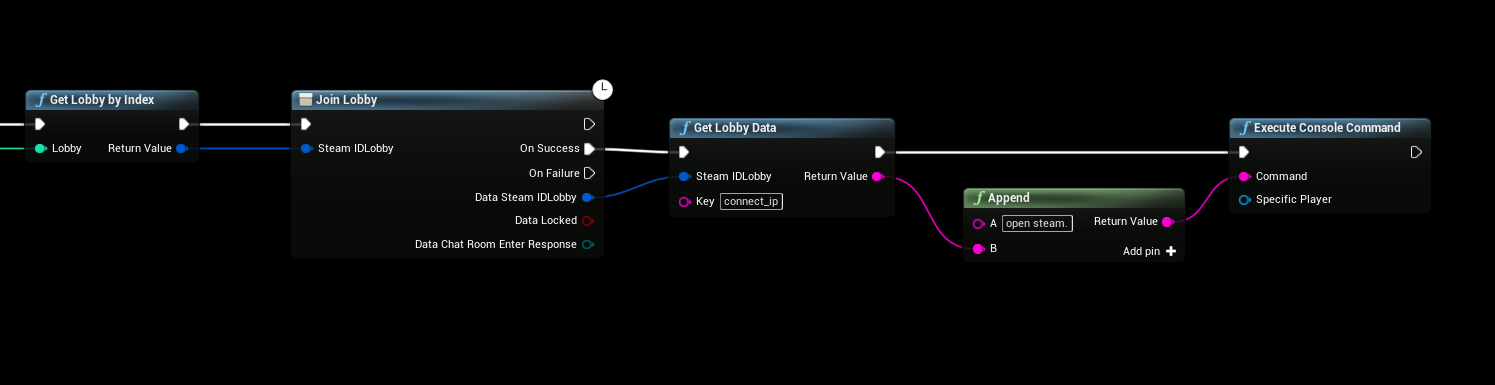 To join the desired session, all we have to do is call “JoinLobby” (because we want to register the playercount in our session, because the game session does not know about the lobby and it’s maximum player count. After joining the lobby, all we have to do is Connect to the game session.
Join Loby -> Get Lobby “connect_ip” -> Open console command -> open steam.steam_id